
On this page
How to Compress a PDF on Mac, iPhone & iPad
Make a PDF smaller without uploading it. Pick a quality preset in PDFTape for Mac, iPhone, or iPad and see how much space you saved.
Overview
Big PDFs bounce off email limits and upload forms. PDFTape shrinks them on your own device, so the document is never sent to a server to be compressed. Compression is part of PDFTape Pro, a one-time unlock on the Mac App Store and the App Store — no subscription.
- Your original file is never changed; you always get a new copy.
- Choose between quality and size with a simple preset.
- If a PDF is already as small as it gets, PDFTape tells you instead of making it bigger.
Compress a PDF on Mac
- 1
Open Compress PDF
On the home screen, click Compress PDF and add your files. Already working in a document? Click Export in the toolbar and choose Compress PDF.
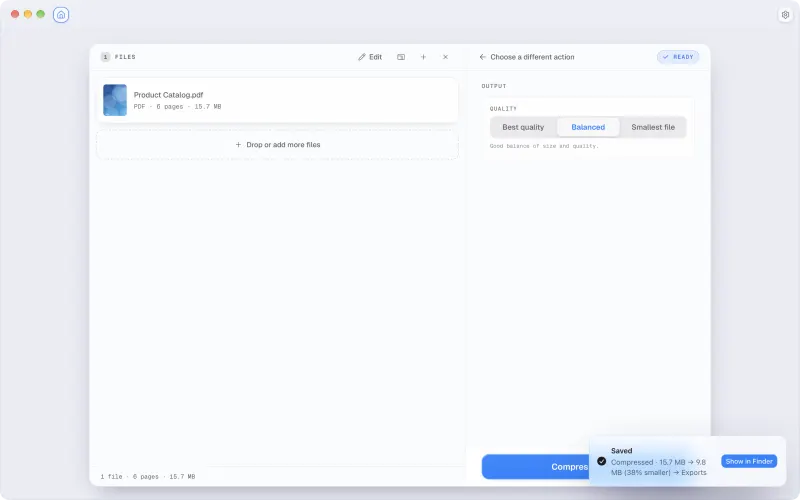
Compress PDF with a quality preset - 2
Pick a quality
Under Quality, choose Best quality, Balanced (the default), or Smallest file. Compressing several PDFs from the home screen? Choose Keep separate for one smaller file each, or Combine into one to merge them first.
- 3
Compress and save
Click Compress PDF and choose where to save. Separate files go into a new
compressed-pdfsfolder, each namedname-compressed.pdf. When it's done, PDFTape shows the size change — for example 2.4 MB → 1.1 MB (54% smaller) — with a Show in Finder button.
Compress a PDF on iPhone and iPad
- 4
Open the Share sheet
Open the document and tap Share PDF in the bottom bar.
- 5
Choose a smaller quality
With Format set to PDF, set Quality to Small or Balanced. For scans, turn on Flatten pages for the smallest file — the pages become images, so text can no longer be selected or searched.
- 6
Share it
Tap Share. The Exports tab shows how much space you saved, like 3.2 MB → 900 KB (−72%). Want a default? Set Compression in Settings.
Which preset should I pick?
- Best quality / Original — keeps images untouched. Use it for print.
- Balanced — a good size cut with little visible change. Right for most email attachments.
- Smallest file / Small — may lower image resolution. Use it for upload forms with tight limits.